
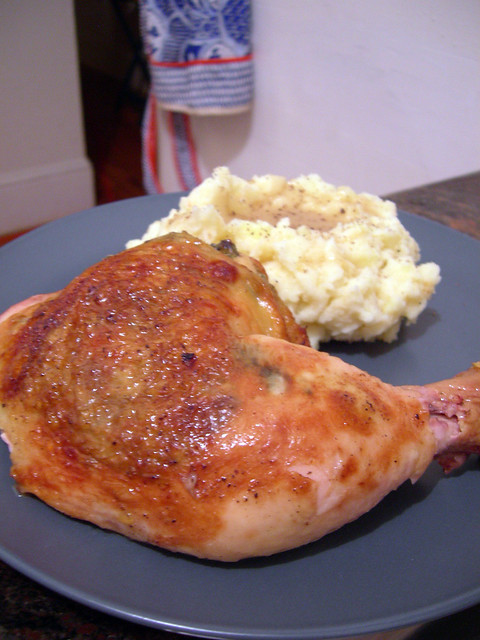
Roasted Chicken and Gravy
I typically reserve my favorite dishes for Sunday night, for a few reasons. I have all day to make any necessary preparations, a nice meal is a good way to top off the weekend, and if there are leftovers, they make for a really good lunch the next day, making Monday a little more tolerable.
And one of my all-time favorites is roasted chicken with mashed potatoes and gravy. And it’s pretty easy to make.
I’ve found that brining chicken improves its flavor and texture immensely. Of course, this requires you to plan ahead a little, but it’s worth it, and adds very little to the active preparation time.
Also, performing a little bit of surgery on the chicken before cooking it ensures that it cooks evenly and quickly. It involves removing the chicken’s spine and keel bone, so it can lie flat in a pan.
Roasted Chicken
I guess I should warn you that this contains graphic chicken-dissection images, and for some reason, this chicken was particularly bloody. Vegetarians may not want to continue. But, come on. It's just a chicken.
You need to make a brine first. There are only a few absolute requirements, and you can experiment and customize it to your heart’s content. To make the brine, you’ll need:
- 1 large chicken
- 1 gallon water
- 1 cup salt
- 1/2 cup sugar
- 1/4 cup acid (vinegar, lemon juice, wine, etc.)
Those are the essential ingredients. It will be perfectly good if they’re all you use. But, that doesn’t mean you can’t add others. Feel free to add anything you like, just don’t overdo it. I like to add a small handful of peppercorns, a few peeled and smashed garlic cloves, a few drops of Worcestershire sauce, and a couple bay leaves.
Place all of the ingredients, except the chicken, in a large pot, and bring to a boil. Stir until the sugar and salt are completely dissolved. Allow to cool to room temperature (at least 3 hours).
Prep the chicken: remove the giblets, and discard (or save to make stock). Place the pot with the cooled brine in the sink, in case it overflows, and place the chicken in the pot. Pour out any excess brine, but make sure the chicken is completely submerged. Refrigerate overnight. The next morning, remove the chicken from the brine, and refrigerate until you’re ready to start cooking.
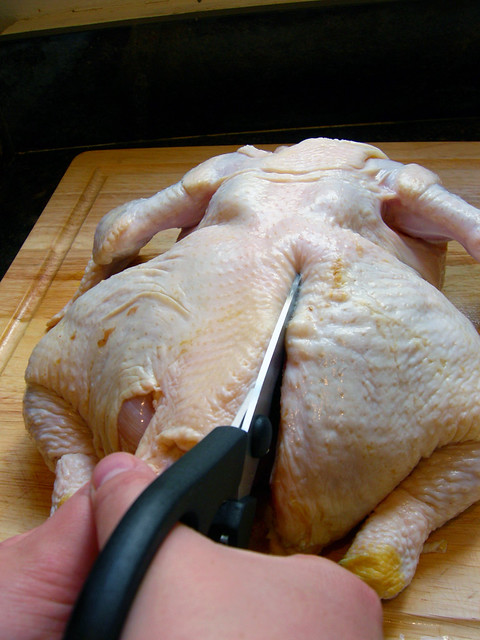
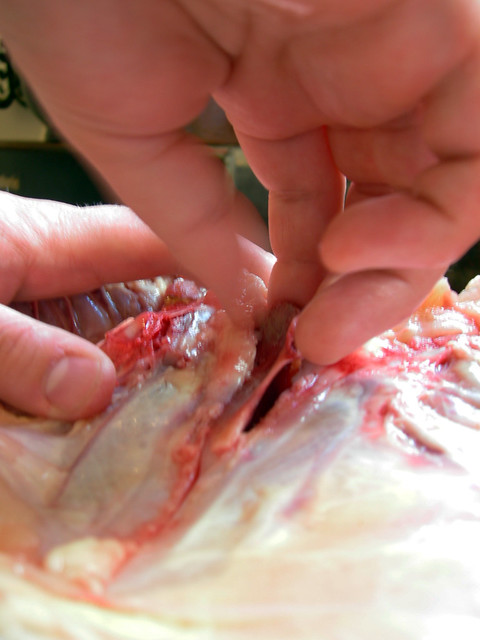
Place the chicken on a cutting board, breast side down. Now comes the fun part, and there’s no tactful way to describe what you’re about to do. Consider yourself warned.
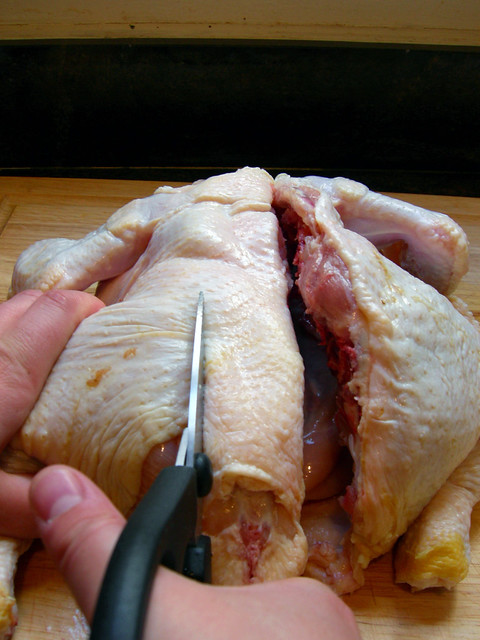
Turn the chicken so its butt is facing you. With a pair of heavy-duty kitchen shears, begin cutting along the side of the spine. Use the tail (that weird little nub at the base of the spine) as a guide. Just place the shears immediately to either side of the tail, and cut, all the way up to the other end.
Repeat on the other side. The backbone is now removed. Discard it, or save it for soup or stock.
Spread the chicken open. Now, you have to remove the breastbone, or keel bone. It runs down the middle of the chicken. With a knife, make an incision right down the middle of the chicken.
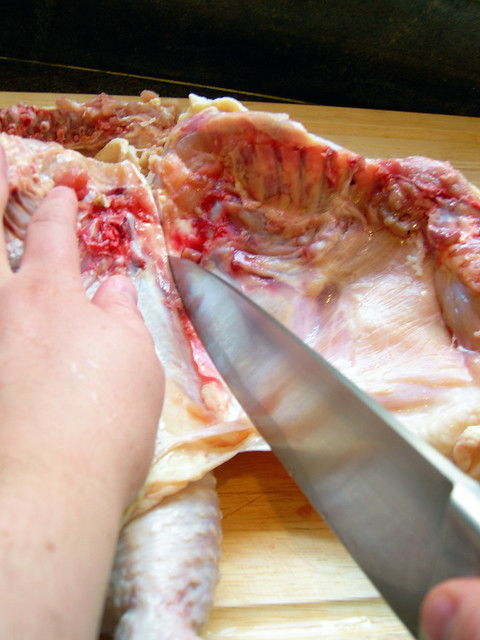
Press the chicken as flat as possible. This should cause the keel bone to pop out, allowing you to pry it the rest of the way out.
The chicken is ready to cook. Place it in a roasting pan, or large skillet, on top of a bed of onions, celery, carrots, and garlic cloves.
You could cook it now, but you have another opportunity to add just a little bit more flavor. I like to make a gremolata:

- 4 cloves garlic, peeled, and roughly chopped
- 1/2 cup parsley leaves, chopped
- 2 teaspoons freshly-ground black pepper
- 1/2 teaspoon salt
- Zest of 1 lemon
- 1 tablespoon olive oil.
In a mortar and pestle, grind the garlic, along with the salt and pepper, into a paste. Add the parsley and lemon zest. Stir in the olive oil, to form a paste. Use your finger to separate the skin from the meat, and place some of the gremolata under the skin of each breast and thigh.

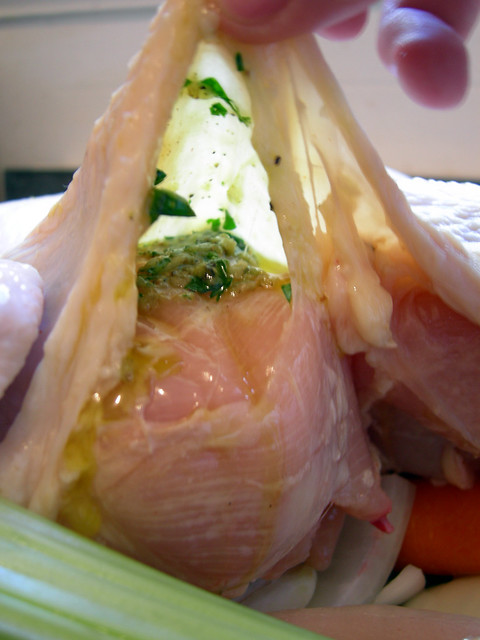
Rub the skin with olive oil, and sprinkle it with some salt and black pepper. Pour about 1 cup of white wine into the pan.
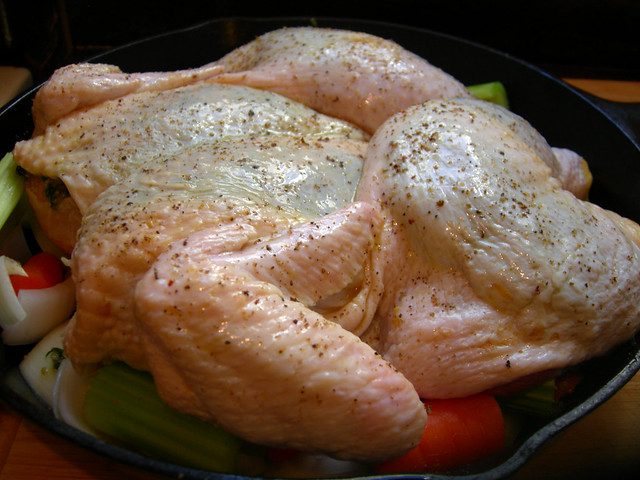
Bake at 375 degrees for about 1 hour – until it reaches an internal temperature of 160 degrees.
Gravy
This happens to be my favorite part, and it’s pretty easy to make.
- Drippings from the roasted chicken
- 1 1/2 tablespoons butter
- 2 tablespoons flour
- About 1 1/2 cups chicken stock
- Pepper
- Salt
Remove the chicken from the pan. Pour all the drippings from the pan into a fine strainer. Put the vegetables from the pan in the strainer, and press them down with a spoon to squeeze out as much of their liquid as possible. Pour the drippings into a gravy separator.
Place the roasting pan on a stove, set to medium heat. Pour about 1 cup of chicken stock into the pan to deglaze it. Use a whisk to scrape up and dissolve all the brown bits stuck to the pan. Let this simmer until reduced by about one third.
Once the drippings are separated, pour the fat into a saucepan on medium heat. Add the butter, and let it melt completely. Let it cook until it has mostly stopped bubbling. Slowly add the flour, whisking constantly, to prevent lumps from forming. Cook for about 2 minutes, to make a roux.
Pour the chicken drippings, the liquid from the deglazed pan, into the roux. Stir to combine, and cook until thickened. If it’s too thick, add a little bit of chicken stock, just a little at a time (it’s better to have a gravy that’s too thick and needs to be thinned, than the other way around). The gravy should be thick enough to easily coat the back of a spoon.
Season with salt and pepper to taste.